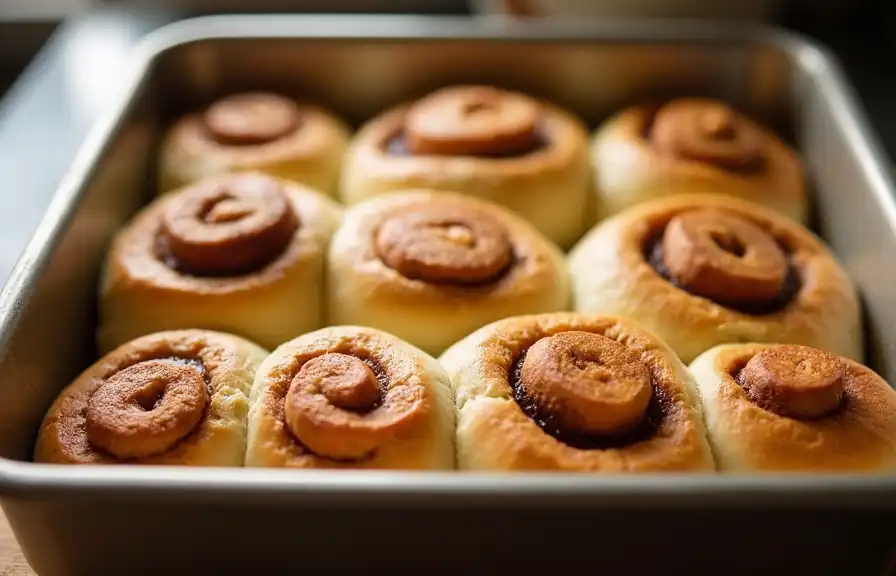
Many bakers wonder, why are my sourdough cinnamon rolls not fluffy? Achieving the perfect texture requires attention to detail in every step.”
Making sourdough cinnamon rolls is a delightful way to enjoy the tangy flavor of sourdough paired with the sweet, comforting taste of cinnamon. However, achieving the perfect fluffy texture can be a challenge for many bakers. If your rolls often turn out dense or heavy, you might wonder what went wrong.
Fluffiness in Sourdough cinnamon rolls is all about the perfect balance of fermentation, dough structure, and baking techniques. Factors like the strength of your sourdough starter, how you knead the dough, and the proofing process can all influence the final texture. Understanding the science behind these aspects can help you troubleshoot and bake rolls that are light, airy, and irresistible.
In this article, we’ll explore the common reasons why sourdough cinnamon rolls might not be fluffy and provide actionable tips to improve your results.

Understanding Sourdough
The Role of Sourdough in Baking
Sourdough starters are the heart of sourdough cinnamon rolls. They bring the unique tangy flavor and act as the leavening agent, replacing commercial yeast. The combination of wild yeast and lactobacilli in a sourdough starter ferments the dough, creating bubbles and aerating the structure for a fluffy texture. However, if the starter is weak or improperly maintained, this may result in your sourdough cinnamon rolls not fluffy. Learn how to maintain a robust starter in our article Is Homemade Sourdough Healthier?. Proper feeding schedules and a float test can ensure the starter is ready to leaven your dough effectively.
How Sourdough Starter Affects Fluffiness
- Starter Strength
A strong, active starter is essential for proper fermentation. If your starter is sluggish, it may not provide enough gas to make the dough rise effectively. Make sure to feed your starter regularly with the right flour-to-water ratio and allow it to fully mature before using it in your recipe. An underfed or overfed starter can be less effective at leavening. - Acidity and Flavor Balance
Sourdough starters can vary in acidity depending on how they are maintained. A very acidic starter can lead to a tighter crumb, which affects fluffiness. Balancing acidity by controlling the feeding schedule and ratios can help improve texture. - Quantity of Starter Used
Using too much starter in the dough can result in over-acidity and compromise gluten development, leading to denser rolls. Conversely, using too little starter may lead to insufficient fermentation.
How to Prepare Your Starter for Cinnamon Rolls
- Timing Your Feedings
For optimal results, feed your starter 6-12 hours before using it in your dough. It should be at its peak activity, with visible bubbles and a doubled size. - Check for Float Test
A simple way to check if your starter is ready is to perform a float test. Drop a small spoonful into water; if it floats, it’s ready to use. If it sinks, it needs more time to ferment or another feeding. - Temperature Considerations
Starters thrive in a warm environment, ideally around 75-78°F (24-26°C). Cold environments can slow fermentation and affect its activity.
When to Replenish or Replace Your Starter
- If your starter has been neglected for a long time and smells unpleasantly sour or shows mold, it might be time to replenish or start a new one. A poorly maintained starter cannot reliably produce fluffy baked goods.
Key Factors for Fluffy Rolls
The Foundations of a Perfect Dough
The dough is the backbone of your sourdough cinnamon rolls. Its consistency, hydration level, and gluten structure directly affect the final texture. A well-prepared dough should be soft, slightly tacky, and elastic, allowing it to rise properly during fermentation.
Choosing the Right Flour
- Protein Content
The type of flour you use determines the protein level, which impacts gluten formation. For fluffy cinnamon rolls, opt for bread flour or a mix of bread flour and all-purpose flour. Bread flour has a higher protein content, which creates strong gluten strands, supporting the dough’s rise. - Avoid Overly Bleached Flour
Bleached flour may not develop gluten as effectively as unbleached flour. For best results, choose a high-quality, unbleached flour. - Incorporating Specialty Flours
While you can add small amounts of whole wheat or spelt flour for flavor, these lower-gluten flours should not exceed 20% of the total flour weight, as they can make the dough denser. Explore how sourdough’s unique properties enhance flavor and texture in Sourdough French Toast: A Classic Twist on a Breakfast Favorite
Balancing Hydration Levels
- What is Hydration?
Hydration refers to the ratio of water to flour in the dough. Higher hydration doughs (65%-75%) tend to produce softer and fluffier rolls because they retain more moisture. However, they are also stickier and harder to handle. - Signs of Proper Hydration
A well-hydrated dough should feel soft but not overly wet. If the dough is too dry, it may not rise properly, leading to dense rolls. Adjust hydration based on the flour type and environment. - Adjusting for Climate
In humid conditions, dough may require slightly less water, while dry environments may need more. Always adjust water gradually to achieve the right consistency.
Mixing and Kneading Techniques
- Gentle Mixing
Overmixing the dough can lead to a tough texture by overdeveloping gluten. Conversely, undermixing may result in uneven gluten formation, making the rolls dense. Use a stand mixer with a dough hook or mix gently by hand until the dough is smooth and elastic. - Kneading for Gluten Development
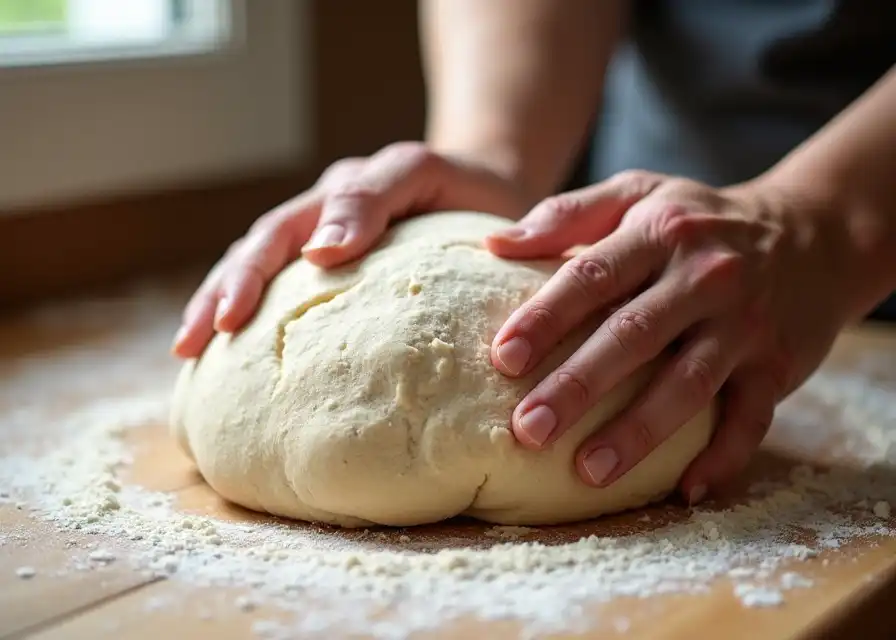
Kneading helps develop the gluten network that traps gas and creates the structure for fluffy rolls. Hand-kneading for about 8-10 minutes or machine-kneading for 5-7 minutes is usually sufficient. - Autolyse Method
Letting the flour and water sit together before adding other ingredients can improve hydration and gluten development. This step, called autolyse, reduces kneading time and creates a more elastic dough.

Adding the Right Amount of Fat and Sweeteners
- Role of Butter and Eggs
Fats like butter and eggs enrich the dough, making it softer and more tender. Be sure to fully incorporate them during mixing to achieve an even texture. - Sugar’s Impact
Sugar not only sweetens the dough but also affects fermentation. Too much sugar can inhibit yeast activity, so balance it carefully.
Resting the Dough for Better Texture
After mixing, allow the dough to rest for 20-30 minutes before kneading again. This rest period helps the flour hydrate fully and makes the dough easier to work with, contributing to better gluten development and a lighter texture.
The Importance of Proper Proofing
Proofing, or allowing the dough to rise, is a crucial step in making sourdough cinnamon rolls fluffy. During this stage, the sourdough starter ferments the dough, creating gas bubbles that help it expand. Insufficient or improper proofing can lead to dense rolls, while overproofing can make the dough collapse.
First Rise (Bulk Fermentation)
- What is Bulk Fermentation?
Bulk fermentation refers to the first rise after the dough has been mixed and kneaded. This stage allows the sourdough starter to create the gas and structure needed for a fluffy texture. - Ideal Timing for Bulk Fermentation
Depending on the activity of your starter and the room temperature, bulk fermentation can take anywhere from 4-8 hours. In cooler environments, this process might take longer, while warmer conditions will speed it up. - Signs of Proper Bulk Fermentation
- The dough should roughly double in size.
- It should feel light and airy when gently poked.
- If the dough collapses when touched, it may have overproofed.
Second Rise (Final Proofing)
- What is Final Proofing?
Final proofing happens after the dough has been shaped into cinnamon rolls. This is the last stage where the dough develops its final volume before baking. - Timing the Final Proof
The final proof usually takes 2-4 hours, depending on the temperature and dough condition. For best results, use the “poke test”—gently press a finger into the dough. If the indentation springs back slowly, the dough is ready. If it springs back quickly, it needs more time; if it doesn’t spring back at all, it may be over proofed. - Overnight Proofing
For convenience, you can refrigerate the shaped rolls overnight for a slow proof. This method enhances the flavor and ensures the dough doesn’t overproof. Be sure to bring the rolls to room temperature before baking.
Temperature and Environment for Proofing
- Maintaining Optimal Proofing Temperatures
Dough ferments best between 75-85°F (24-29°C). If your kitchen is too cold, use a proofing box or place the dough in a warm oven (turned off) with a bowl of warm water. - Humidity Levels
Sourdough doughs thrive in a slightly humid environment. Cover the bowl or baking dish with a damp towel or plastic wrap to prevent the dough from drying out during proofing. - Dealing with Cold Weather
If proofing is slow in cold weather, extend the rise time or consider using a heated mat to keep the dough warm.

Common Proofing Mistakes
- Under proofing
Under proofed dough doesn’t rise enough, resulting in dense rolls with tight crumbs. This is often due to impatience or an inactive starter. - Over proofing
Over proofed dough loses its structure and can collapse, leading to flat rolls. This happens when fermentation is allowed to go too far, especially in warm environments. - Skipping the Final Proof
Failing to give the dough adequate time to proof after shaping can lead to heavy and chewy rolls, as the gluten doesn’t get a chance to relax and expand.
Retarding for Flavor and Texture
- Benefits of Slow Proofing
Refrigerating the dough during the final proof slows down fermentation, allowing the flavors to deepen and the gluten structure to strengthen. - How to Retard Properly
Cover the shaped rolls tightly with plastic wrap or a lid before placing them in the fridge. Ensure they are proofed to about 80% of their intended rise before refrigerating to avoid overproofing overnight.
Why Kneading is Critical for Fluffy Rolls
Kneading plays a fundamental role in developing the gluten structure of your dough. Gluten is the network of proteins that trap gas produced during fermentation, giving your rolls their structure and allowing them to rise. Without proper gluten development, your sourdough cinnamon rolls can end up dense and tough.
The Science of Gluten Formation
- What is Gluten?
Gluten is formed when water combines with proteins in the flour (glutenin and gliadin). Kneading stretches and aligns these proteins, creating a strong yet elastic network. - Role of Gluten in Fluffiness
A well-developed gluten structure supports the dough during fermentation, holding onto the gas bubbles and creating an airy texture. If gluten is underdeveloped, the dough will be weak and collapse during proofing or baking.
Proper Kneading Techniques
- Hand Kneading
- Push the dough forward with the heel of your hand, then fold it back over itself. Rotate the dough slightly and repeat.
- Knead for 8-10 minutes until the dough is smooth and elastic.
- Using a Stand Mixer
- Attach the dough hook and knead on medium-low speed for 5-7 minutes. Stop occasionally to check the dough’s elasticity and avoid overworking it.
- The Windowpane Test
To test if the dough is kneaded enough, stretch a small piece of it between your fingers. If it forms a thin, translucent “windowpane” without tearing, the gluten is properly developed.
Common Kneading Mistakes
- Over kneading
Over kneading is rare in hand-kneading but more common with stand mixers. Overworked dough becomes too tight and elastic, making it difficult for the rolls to rise properly. This can result in tough and chewy rolls. - Undermixing
A common issue for beginners, undermixed dough won’t develop enough gluten, leading to weak structure and dense rolls. If the dough tears easily during the windowpane test, it needs more kneading. - Adding Too Much Flour
Adding excessive flour during kneading can dry out the dough, making it stiff and less able to rise. Only add flour sparingly to prevent sticking.
Incorporating Ingredients Without Compromising Gluten
- Adding Butter and Sweeteners
Enriched doughs, like those for cinnamon rolls, often include butter, eggs, and sugar. These should be added gradually after initial gluten development to avoid interfering with the dough’s structure. - Filling Ingredients
When spreading the cinnamon-sugar filling, be careful not to tear the dough. Rolling it too tightly or overfilling can also disrupt the dough’s structure, leading to uneven rolls.
Resting the Dough After Kneading
- Allowing Gluten to Relax
After kneading, let the dough rest for 20-30 minutes. This allows the gluten to relax and become easier to handle, preventing tears during shaping. - Signs of Well-Kneaded Dough
- Smooth surface and slight elasticity.
- Bounces back when poked lightly.
- Doesn’t stick excessively to your hands or the work surface.
Alternatives to Traditional Kneading
- Stretch and Fold Method
If you prefer not to knead by hand or with a mixer, use the stretch and fold technique. This involves stretching the dough and folding it over itself at intervals during bulk fermentation, gradually developing the gluten. - Slap and Fold Method
A technique used for high-hydration doughs, this involves slapping the dough onto a surface and folding it back over itself repeatedly.
Common Mistakes in Sourdough Cinnamon Rolls
Making sourdough cinnamon rolls is a delicate process, and even small missteps can lead to dense or heavy results. Let’s explore the most frequent errors and how to address them to achieve perfectly fluffy rolls.
Over proofing or Under proofing
- Over proofing
- Over proofed dough loses its structure and deflates, resulting in flat rolls with little oven spring.
- Fix: Pay attention to proofing times and use the poke test to gauge readiness. If over proofed, reshape the rolls gently, give them a short rise, and bake immediately.
- Under proofing
- Under proofed dough hasn’t risen enough, leading to dense rolls with a tight crumb.
- Fix: Extend the proofing time in a warm environment. If the dough feels cold or sluggish, warm it slightly to encourage fermentation.

Weak or Inactive Starter
- Signs of a Problem
A weak starter produces minimal bubbles and doesn’t double in size. Using it leads to insufficient gas production in the dough.- Fix: Feed your starter consistently for 3-5 days before baking to strengthen it. Use warm water and a 1:1:1 feeding ratio (equal parts starter, flour, and water by weight).
- When to Replace Your Starter
If your starter smells unpleasant or has visible mold, discard it and create a new one.
Using the Wrong Flour
- Low-Protein Flour
Using all-purpose flour with low protein content can hinder gluten development, leading to weak dough.- Fix: Switch to bread flour or blend it with all-purpose flour for a balance of structure and softness.
- Overuse of Whole Grains
Excessive whole-grain flour can make the dough too dense.- Fix: Limit whole-grain flour to 20% or less of the total flour weight.
Errors in Shaping and Filling
- Rolling the Dough Too Tight
- Overly tight rolls prevent the dough from expanding during proofing and baking.
- Fix: Roll the dough gently and avoid stretching it too much when adding filling.
- Overfilling with Cinnamon-Sugar Mixture
- Too much filling can make the layers dense and prevent even rising.
- Fix: Use the recommended amount of filling and distribute it evenly.
Improper Baking Techniques
- Oven Temperature Issues
- Baking at too low a temperature can result in dense, underbaked rolls, while too high a temperature can cause them to brown too quickly without proper rising.
- Fix: Bake at 350°F (175°C) and preheat your oven thoroughly to ensure even baking.
- Using a Cold Dough
- Baking dough straight from the fridge can prevent proper oven spring.
- Fix: Allow rolls to come to room temperature before baking.

Troubleshooting Dense Cinnamon Rolls
- Add Vital Wheat Gluten
For doughs that struggle with gluten development, adding a small amount of vital wheat gluten can improve elasticity and structure. - Improve Hydration
If the dough feels stiff, increase the water content slightly. A well-hydrated dough creates a softer crumb. - Experiment with Timelines
Extend fermentation and proofing times gradually to find the sweet spot for your rolls. Each environment and starter can behave differently, so some trial and error may be necessary.
FAQs
Why did my cinnamon rolls spread out instead of rising?
Spreading is often caused by over proofing or rolling the dough too loosely. To fix this, proof for shorter periods and roll the dough tightly but not overly so.
Can I use sourdough discard for cinnamon rolls?
Sourdough discard doesn’t have the strength to leaven rolls, but it can add flavor. Combine discard with commercial yeast if using it in your recipe.
How do I make my rolls softer after baking?
Brush freshly baked rolls with melted butter or cream to add moisture and softness. Store them in an airtight container to prevent drying out.
Why are my rolls gummy in the middle?
Gummy centers can occur from under baking or using dough that’s too wet. Ensure your rolls are fully baked by checking with a thermometer (190°F or 88°C internally).
Can I freeze the dough before baking?
Yes, shaped rolls can be frozen before the final proof. When ready to bake, thaw them overnight in the refrigerator and proof until doubled in size before baking.
What is the best way to reheat sourdough cinnamon rolls?
Reheat rolls in the oven at 300°F (150°C) for 10-12 minutes, covered with foil to prevent drying.
Conclusion
Fluffy sourdough cinnamon rolls require a harmonious balance of technique, timing, and ingredients. By focusing on a strong sourdough starter, proper kneading, effective proofing, and avoiding common mistakes, you can consistently achieve light and airy results. Don’t be discouraged by initial setbacks—each batch offers a learning opportunity to refine your skills.
Experiment with these tips, and soon, your sourdough cinnamon rolls will become a household favorite, delighting everyone with their perfect fluffiness and tangy-sweet flavor.

