Introduction
Butterfinger Balls recipe are bite-sized treats that combine the nostalgic flavor of Butterfinger candy with creamy peanut butter, covered in rich chocolate. These no-bake delights are incredibly easy to make and require just a handful of ingredients. Whether you’re prepping for a holiday party, looking for a quick dessert, or making edible gifts, Butterfinger Balls recipe are a surefire hit.
What Are Butterfinger Balls?
Butterfinger Balls are a homemade candy made by blending crushed Butterfinger candy bars with creamy peanut butter, rolling the mixture into bite-sized balls, and coating them with melted chocolate. They deliver a crunchy, creamy, and chocolaty flavor in every bite.
Why You’ll Love This Recipe
- Quick and Easy: No baking is required, making this recipe simple and convenient.
- Crowd-Pleaser: Loved by kids and adults alike, these treats are perfect for any gathering.
- Customizable: Add your own twist by incorporating flavors like coconut, nuts, or sprinkles.
Perfect for Holidays, Parties, or Gifting
Butterfinger Balls are versatile treats that can be tailored for any occasion. Decorate them with holiday-themed toppings, package them in decorative boxes for gifting, or serve them at a party for instant smiles.
Ingredients Needed
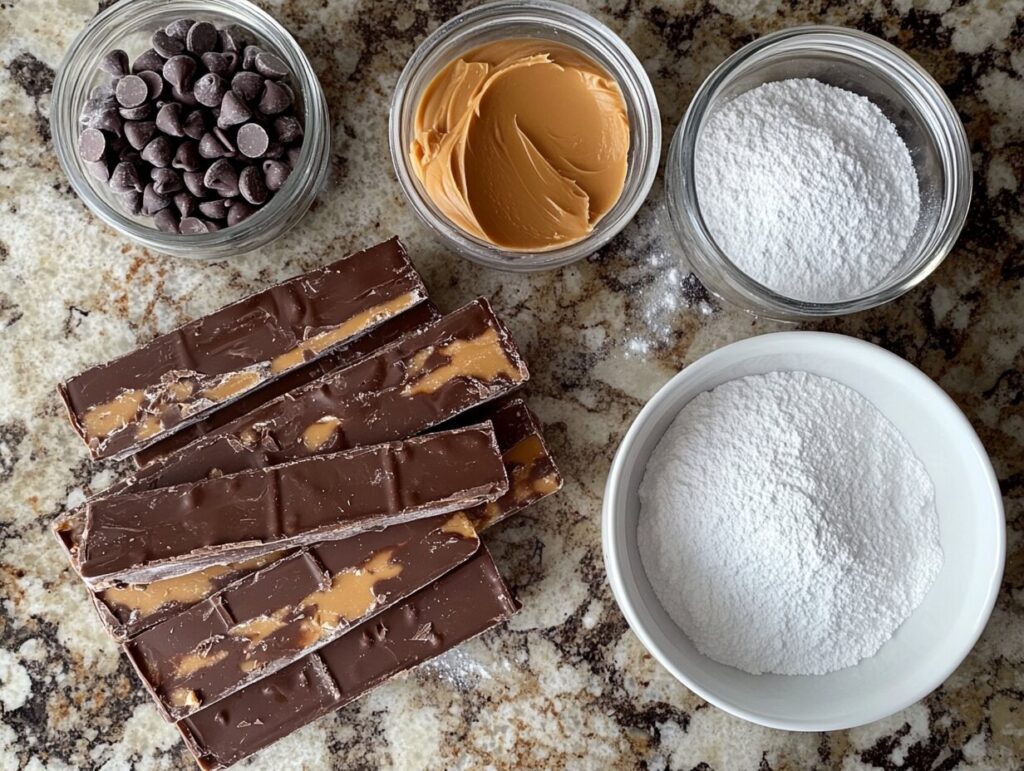
To make Butterfinger Balls recipe, you’ll need just a few simple ingredients. These are pantry staples combined with the iconic Butterfinger flavor for a delightful result. Let’s dive into what you’ll need to get started.
Core Ingredients
- Butterfinger Candy Bars (Crushed):
The star of the recipe, Butterfinger candy bars provide the distinct crunch and flavor. You’ll need about 10-12 mini bars or 3-4 regular-sized bars. Crush them into small pieces to incorporate them easily into the mixture. - Creamy Peanut Butter:
Peanut butter adds creaminess and helps bind the crushed candy bars together. Use high-quality creamy peanut butter for the best texture and taste. - Powdered Sugar:
A small amount of powdered sugar balances the flavors and helps to thicken the mixture for easy shaping. - Chocolate for Coating:
You can use milk chocolate, semi-sweet chocolate chips, or dark chocolate depending on your preference. Melt the chocolate for a smooth, even coating. - Butter (Optional):
A tablespoon of softened butter can make the mixture easier to shape, especially if your peanut butter is thick.
Substitutions and Variations
- Peanut Butter Alternatives: If you have a peanut allergy, try almond butter or sunflower seed butter as substitutes.
- Chocolate Options: White chocolate or flavored candy melts can be used for a creative twist.
- Add-ins: Enhance the flavor by adding shredded coconut, chopped nuts, or mini chocolate chips to the mixture.

Ingredient Notes
For a gluten-free version, ensure the Butterfinger candy bars and chocolate coating you choose are certified gluten-free. Always check packaging for allergen warnings.
Explore more delightful recipes to pair with your Butterfinger Balls:
- Avocado Toast in French Cuisine: Balance the sweetness of the Butterfinger Balls with a savory and healthy breakfast idea.
How to Make Butterfinger Balls
Making Butterfinger Balls recipe is a straightforward process that even beginner cooks can master. Follow these step-by-step instructions for perfect results every time.
Step-by-Step Instructions
- Crush the Butterfingers:
Place the Butterfinger candy bars in a zip-top bag and crush them using a rolling pin or food processor. Aim for a mix of fine crumbs and small chunks for the best texture. - Prepare the Mixture:
In a large mixing bowl, combine the crushed Butterfingers balls, creamy peanut butter, and powdered sugar. Mix thoroughly until the ingredients are fully incorporated and form a thick, moldable dough. - Shape into Balls:
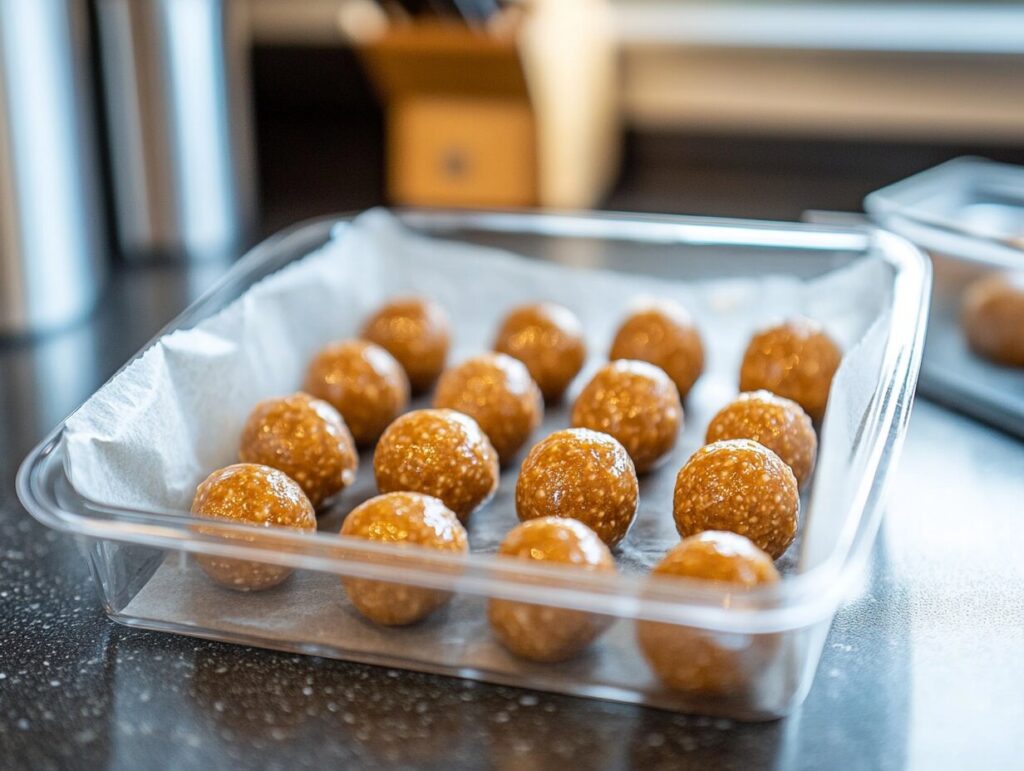
Scoop out small portions of the mixture using a tablespoon or cookie scoop. Roll them into smooth, bite-sized balls with your hands. Place them on a baking sheet lined with parchment paper. - Chill the Balls:
Refrigerate the balls for 20-30 minutes. This step ensures they hold their shape when dipped in melted chocolate. - Melt the Chocolate:
In a microwave-safe bowl, melt the chocolate chips or chocolate coating in 30-second intervals, stirring between each interval, until smooth. Avoid overheating to prevent the chocolate from seizing. - Dip and Coat:
Using a fork or dipping tool, carefully dip each chilled ball into the melted chocolate. Allow excess chocolate to drip off before placing the coated ball back on the parchment-lined baking sheet. - Decorate (Optional):
While the chocolate is still wet, sprinkle the balls with crushed Butterfingers, sprinkles, or a drizzle of contrasting chocolate for decoration. - Set the Chocolate:
Let the chocolate coating set by refrigerating the balls for another 20-30 minutes. Once the chocolate is firm, your Butterfinger Balls are ready to serve! For more chocolatey inspiration, see our guide on creative uses for chocolate in desserts.
Tools and Equipment You’ll Need
- Mixing bowl
- Rolling pin or food processor
- Cookie scoop or tablespoon
- Microwave-safe bowl
- Fork or dipping tool
- Baking sheet and parchment paper
Tips for the Best Butterfinger Balls
Achieving the perfect Butterfinger Balls recipe requires a little attention to detail. Here are some expert tips to ensure your treats turn out just right every time.
Achieving the Perfect Texture
- Crushing the Butterfingers:
Use a rolling pin or food processor to achieve the ideal texture. A mix of fine crumbs and small chunks works best for a crunchy yet creamy result. - Balancing the Mixture:
If the mixture feels too sticky, add a little more powdered sugar, one tablespoon at a time. If it’s too dry, mix in a small amount of peanut butter until the consistency is right. - Chilling the Mixture:
Chilling the shaped balls before dipping them in chocolate ensures they hold their shape during the coating process.
How to Avoid Common Mistakes
- Overheating the Chocolate:
When melting chocolate, always use short bursts in the microwave and stir in between. This prevents scorching and ensures a smooth, glossy finish. - Uneven Coating:
Use a fork or dedicated dipping tool to achieve an even chocolate coating. Tap the tool gently on the edge of the bowl to let excess chocolate drip off. - Setting the Chocolate Properly:
Refrigerating the coated balls is essential for setting the chocolate. Avoid skipping this step to prevent a sticky mess.
Presentation Tips
- Decorative Toppings:
Sprinkle crushed Butterfinger crumbs, colored sprinkles, or a drizzle of white chocolate over the balls while the coating is still wet. - Serving Ideas:
Arrange Butterfinger Balls on a decorative plate or package them in festive tins or boxes for gifting. - Custom Wrapping:
Place each ball in a small candy wrapper or cupcake liner for a professional look. For even more delicious recipes, visit All You Recipes.
Variations of Butterfinger Balls
One of the best things about Butterfinger Balls recipe is their versatility. You can customize them to suit dietary needs, personal tastes, or specific occasions. Here are some creative ideas to inspire you.
Adding Unique Flavors
- Coconut Butterfinger Balls:
Mix shredded coconut into the filling for a tropical twist. You can also use coconut-flavored chocolate for coating. - Nutty Variations:
Add chopped almonds, pecans, or walnuts to the mixture for an extra layer of crunch. - Spiced Butterfinger Balls:
Incorporate a pinch of cinnamon or nutmeg for a warm, spiced flavor perfect for fall or winter.
Making Them Gluten-Free or Dairy-Free
- Gluten-Free Version:
Ensure the Butterfinger candy bars and chocolate coating are certified gluten-free. Many brands offer gluten-free options for these ingredients. - Dairy-Free Version:
Substitute dairy-free chocolate chips and a plant-based butter alternative if needed. Natural nut butters can replace traditional peanut butter.
Seasonal and Themed Variations
- Holiday-Themed Balls:
Use red and green sprinkles for Christmas, pastel-colored decorations for Easter, or orange and black for Halloween. - Birthday Treats:
Add rainbow sprinkles to the chocolate coating for a festive birthday snack. - Elegant Options:
Drizzle dark chocolate over white chocolate-coated balls or dust them with edible gold powder for a sophisticated touch.
How to Store Butterfinger Balls
Proper storage ensures your Butterfinger Balls stay fresh and delicious for as long as possible. Whether you’re making them in advance or saving leftovers, follow these tips for the best results.
Storing for Short-Term Use
- Room Temperature:
If your home is cool (below 70°F), you can store Butterfinger Balls in an airtight container at room temperature for up to 3 days. Place parchment paper between layers to prevent sticking. - Refrigeration:
For extended freshness, store the balls in the refrigerator. Keep them in an airtight container to prevent the chocolate from absorbing odors from other foods. Refrigerated Butterfinger Balls recipe will last up to 1 week.
Freezing for Later
- How to Freeze Butterfinger Balls:
- Arrange the balls in a single layer on a baking sheet lined with parchment paper.
- Freeze them until firm, then transfer to a freezer-safe container or zip-top bag. Place parchment paper between layers to prevent sticking.
- Shelf Life in the Freezer:
Properly stored, Butterfinger Balls can be frozen for up to 3 months. - Thawing Instructions:
When ready to enjoy, transfer the desired number of balls to the refrigerator and let them thaw overnight. Avoid microwaving or exposing them to heat to preserve the chocolate coating.
Pro Tip :
Label your container with the date of preparation to keep track of their freshness

FAQs
Can I Use Homemade Butterfingers?
Yes! If you prefer a fully homemade approach, you can make your own Butterfinger candy bars and crush them for this recipe. Homemade bars often have a softer texture, which might alter the consistency slightly.
How Long Do Butterfinger Balls Last?
- Room Temperature: 3 days in a cool environment.
- Refrigerated: Up to 1 week.
- Frozen: Up to 3 months.
What Can I Substitute for Chocolate?
If you’re looking for alternatives to chocolate coating, consider:
- White chocolate or candy melts for a different flavor profile.
- Caramel drizzle for a sticky, gooey finish.
- Powdered sugar dusting for a simple yet elegant look. Explore more bite-sized delights like Butterfinger Balls.
Can I Make These in Advance?
Absolutely! Butterfinger Balls recipe are perfect for make-ahead preparation. Freeze them in advance, then thaw as needed for parties or special events.
What If the Mixture Is Too Sticky?
If the mixture is too sticky to shape, try chilling it in the refrigerator for 10-15 minutes. Adding a small amount of powdered sugar can also help firm up the consistency.
Can I Use Different Candy Bars?
While Butterfinger balls is the classic choice, you can experiment with other candy bars like Snickers, Twix, or Heath for unique flavors.
Conclusion
Butterfinger Balls recipe are a delightful treat that combines simplicity, versatility, and indulgence. Whether you’re making them for a holiday party, a gift, or simply to satisfy your sweet tooth, these bite-sized desserts are sure to impress. With endless variations and easy storage options, they’re a fantastic addition to your dessert repertoire.

